Raspberry Pi – News and Resources
Whatever computer system you use, you will want a screen capture utility. With Raspberry Pi, at the time of writing this article, it’s necessary to install this utility.
Install Using Simple Command Line Steps
You can use the following commands to install the Gnome screenshot utility.
- Type this command to make sure your Raspberry Pi installation is up-to-date: sudo apt update && sudo apt upgrade
- Type this command to install the Gnome screenshot utility: sudo apt install gnome-screenshot
- This will result in the screenshot utility being installed.
- From the Raspberry Pi system menu (top left of screen) choose Accessories > Screenshot to use the utility.
Install Using a Menu Interface
Follow these instructions to install a screen capture utility for Raspberry Pi:
- From the Raspberry Pi system menu (top left of screen) choose Preferences > Add / Remove Programs.
- In the search box (top left) type in screenshot and press the enter/return key to search.
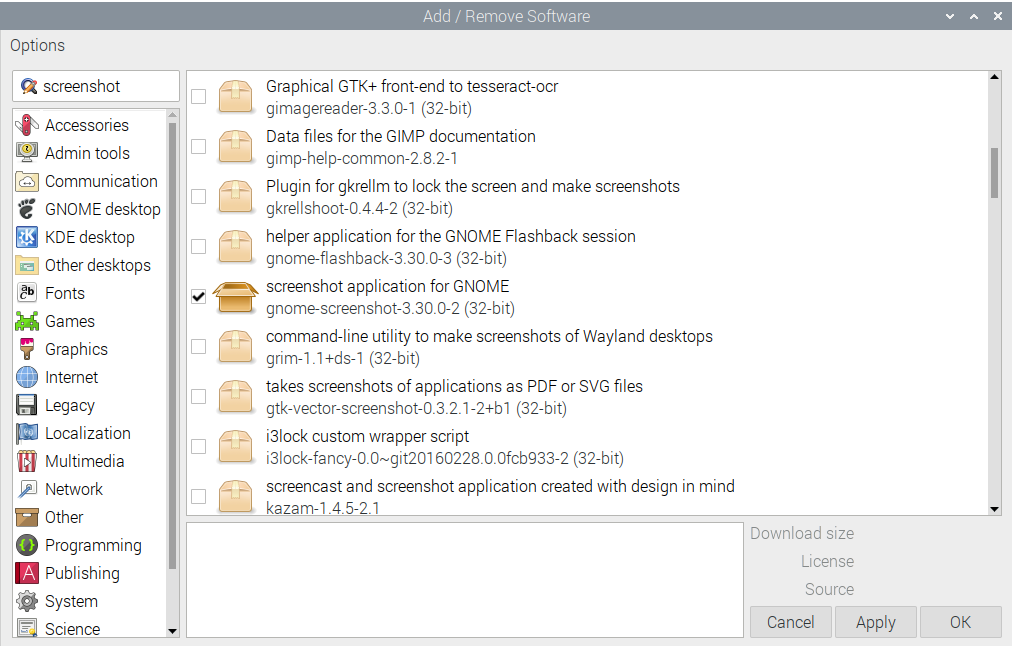
- Scroll down to find screenshot application for GNOME, as shown below, and put a check next to it. Then press the OK button. This will result in the screenshot utility being installed.
- From the Raspberry Pi system menu (top left of screen) choose Accessories > Screenshot to use the utility.