Summary
A login PIN offers a quick and easy way to login on a device. The password may still be necessary at times, but for most identification purposes the PIN can be used. This page describes how to setup a PIN in Windows 11.
STEP #1 — Settings
Go to the Windows 11 Settings page by clicking on the gear icon in the start menu.
STEP #2 — Accounts
In the left column of the Settings page, choose Accounts
STEP #3 — Sign-in Options
Scroll down to click on Sign-in Options.
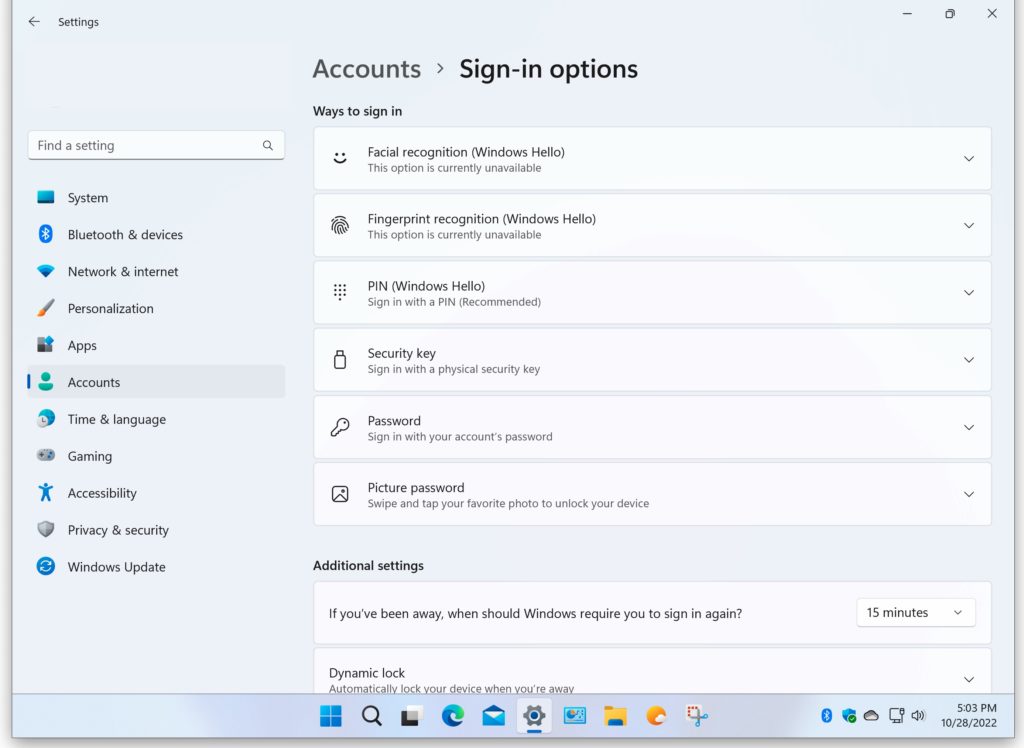
STEP #4 — PIN (Windows Hello)
Select the PIN (Windows Hello) option and follow the instructions.
If prompted to add a password first, you can do that by selecting the Password option found below the PIN option as shown below.
Additional Information
Once the PIN is setup, you can begin using that number to login. If you forget the PIN, you can login with the password instead. The login page lets you toggle between PIN and password logins.
Note that when you login using a PIN, it is not necessary to press the Enter key. When you login using a password, it is necessary to press the Enter key after entering the password.
